Skip to content
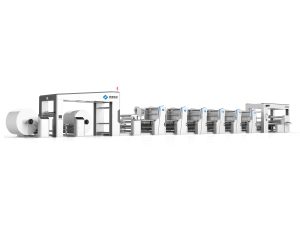
Stack-type flexographic printing presses are an excellent choice for label printing, offering a balance of simplicity, flexibility, and print quality. Their modular design, where printing units are stacked vertically around a central impression cylinder, allows for easy setup of multi-color jobs. This guide provides a straightforward approach to setting up your stack press for 2-color and 4-color label runs, helping you achieve sharp, consistent results.
Understanding Your Stack Press Setup for Labels
Before starting the press, it’s crucial to understand the basic configuration. The table below outlines the key setup differences between 2-color and 4-color jobs on a typical stack press.
| Setup Parameter | 2-Color Label Run | 4-Color Label Run |
|---|---|---|
| Printing Units | Utilizes 2 stacked units (e.g., units #1 and #2). | Utilizes all 4 stacked units (units #1 through #4). |
| Color Assignment | Typically spot colors (e.g., PMS 185, Black). | Typically process colors: Cyan (Unit 1/2), Magenta (Unit 2/3), Yellow, Black. Order depends on machine layout. |
| Plate Cylinders | Install plates for two colors only. | Install plates for all four process colors, ensuring precise image registration. |
| Anilox Rollers | Select rollers with appropriate line screens for spot colors (e.g., 200-400 lpi for solids, 500-800+ lpi for fine detail). | Use anilox rollers with higher line screens (e.g., 600-1000 lpi) for process colors to hold fine dots and control ink film. |
| Drying/Interstation | Minimal interstation drying needed. Main dryer after unit 2 is sufficient. | Critical interstation drying required between units to prevent wet-on-wet smearing, especially for process inks. |
| Key Impression Points | Maintain consistent pressure on the two active units. Ensure plates are clean and mounted squarely. | Critical “dot-on-dot” registration. Impression pressure must be precisely balanced across all four units to avoid dot gain or crushing. |
Planning and Plate Mounting: The Foundation of Success
The setup begins long before you touch the press. For any label job, start by determining your color sequence. For a 4-color process job, the common sequence is Black, Cyan, Magenta, Yellow, but this can vary based on ink opacity and substrate. For a simpler 2-color spot job, assign your primary and secondary colors to the available units. When mounting plates, use a plate mounter with a microscope to ensure precise positioning on the cylinder. For 4-color work, any error here is magnified across all subsequent units, making accurate mounting absolutely critical for achieving tight registration on your final label.

Anilox Roller Selection: Controlling Ink Volume
The anilox roller is the heart of ink control. It meters the exact amount of ink transferred to your printing plate. For a 2-color label, your choice depends on the graphics. If you are printing large solid areas, you will need an anilox with a lower line screen (e.g., 200-300 lpi) and higher cell volume to lay down enough ink for a dense, solid color. For fine text or line work, a higher screen count (e.g., 500-600 lpi) is better. For 4-color process labels, you need consistent, fine halftone dots. Therefore, use anilox rollers with a high line screen (typically 600 to over 1000 lpi) for all four stations to ensure the tiny dots are transferred cleanly without filling in, which is essential for achieving a wide color gamut and sharp images.
Setting Impression: The Balance of Pressure
Setting impression pressure is perhaps the most delicate part of the setup. The goal is to achieve complete ink transfer with the minimum necessary pressure. Too much pressure causes “dot gain” (dots print larger than intended), leading to muddy colors and poor image quality, especially in 4-color work. Start by setting the plate cylinder pressure against the substrate (backing cylinder). Use a strip of shim stock or feeler gauge to get a light, even contact across the entire plate. Then, set the ink transfer pressure between the anilox roller and the plate cylinder. For a 2-color job, you have more tolerance, but for 4-color, you must be meticulous. Check the impression at each unit, one by one, and pull proofs to check for squash or missed areas.
Drying and Web Handling for Multi-Color Labels
Proper drying is non-negotiable for multi-color label printing on a stack press. Because the web passes through each printing unit in sequence, ink from the first unit must be dry or “set” before reaching the second unit to prevent off-setting onto subsequent rollers or smearing. For a 2-color run, the main dryer after the last unit is often sufficient. However, for a 4-color job, you must rely on the interstation dryers (located between printing units). Ensure these are functioning at the correct temperature and airflow for your substrate and ink system. Also, maintain consistent web tension throughout the stack. Fluctuations in tension will throw off the delicate registration required for 4-color labels, causing colors to misalign.
Registration and Proofing for Final Output
Before running the full job, pull a multi-color proof and carefully check the registration. Use the press’s side-to-side and circumferential registration adjustments to fine-tune each color unit so they align perfectly on the label. For a 2-color job, this is relatively quick. For a 4-color job, this is an iterative process. Check register marks with a loupe, adjust, and proof again until all colors are accurately nested. Once registration is dialed in, check the overall color balance against a customer proof or standard. You may need to make minor adjustments to ink viscosity or impression to match the desired color.
FAQs
Q: What is the main difference in setup for 2-color vs. 4-color labels on a stack press?
A: The primary difference is precision. 4-color process printing requires much tighter control over plate mounting, anilox roller selection (higher line screens), interstation drying, and impression pressure to manage fine halftone dots and achieve accurate color registration. 2-color spot work is generally more forgiving.
Q: Why is interstation drying so critical for 4-color label printing?
A: Without sufficient drying between stations, the wet ink from the first color would mix with the ink on subsequent plates or smear as the web travels through the press. This ruins the print. Interstation dryers “set” the ink, allowing the next color to be printed cleanly on top.
Q: How do I choose the right anilox roller for a process color?
A: For process colors (CMYK), you need a roller with a high line screen, typically between 600 and 1200 lines per inch (lpi). This fine cell structure meters a thin, consistent film of ink, which is essential for holding the tiny halftone dots that create the illusion of continuous tones and a wide color range.
Q: My 4-color labels have registration issues. What should I check first?
A: First, check your plate mounting accuracy. Even a slight skew on the cylinder is magnified across the web. Second, verify that your web tension is consistent and stable. Fluctuating tension is a common cause of misregister. Finally, ensure the impression pressures are balanced and not too heavy, as excessive pressure can distort the substrate.
Conclusion
Setting up a stack-type flexo press for labels is a methodical process. By carefully planning your color sequence, selecting the correct anilox rollers, meticulously balancing impression pressures, and ensuring proper interstation drying, you can achieve professional results for both simple 2-color spot labels and complex 4-color process work. Mastering these steps minimizes waste and maximizes press uptime.
Ready to enhance your label printing capabilities with a reliable, high-performance stack flexo press? With over 20 years of industry experience, PuJi Machinery offers robust and precise printing solutions tailored to your needs. Contact our team today to discuss your requirements and find the perfect machine for your shop.